If you’re here, chances are you already know if there is a particular mule bit or donkey bit you should be using or if there are differences between bits for horses and bits for mules / donkeys.
But first, what is a bit? It is important to understand what you’re actually going to be using on your animal.
Bits are made of metal or synthetic material. You place the bit in the mouth to assist in your communication with your animal. When talking about a mule bit, there are several things owners need to be aware of in order to use the right bit, for the right time, and the right function.
The bit extends from one side of the bar to the other and rests on the bars of the mouth, in a Molly (mare mule) between the incisors and the molars where there are no teeth; in a John mule has a canine tooth between incisors and the molars. The bit is held on the head by a bridle and the bridle has reins attached to it.
In this article you are going to learn everything you need to know in order to select the right bit for your mule.
Donkey owner? Good news! Everything we cover in this article applies to you, too!
Early Days of the Mule Bit
The bit didn’t always exist. Riders of early domesticated equines probably used some type of bit-less headgear made of sinew, bone, horn, hard wood, leather or rope. Because the earliest headgear was made of materials that didn’t hold up over time, no one can really say which came first—the bitted or the bit-less bridle.
Bits Found Before Christ
Now, without getting too deep into the history, there is evidence of the use of bits in ancient Kazakhstan, dating way back to 3500-3000 BC. There is also evidence of bit wear on horses’ teeth found in the Ukraine from 4000 BC. Lastly, antler cheek pieces used as toggles for rope, hide, or sinew mouthpieces have been found at sites on the Black Sea.
Metal bits came about possibly in the Near East between 1300 and 1200 BC and were originally made of bronze. Plain and jointed mouth pieces appeared at the same time, often with highly ornamented cheekpieces—one thing that hasn’t changed, we like our bits to be lookers!
Modern Bits
In modern times, nickel was a favored material until about 1940, when stainless steel largely replaced it.
Copper, aurigan (copper alloy) and sweet iron (cold rolled steel) are incorporated into some bits to encourage salivation in the mouth of the animal which, in turn, encourages a softer mouth and relaxed jaw.
Why mention any of this?
Because it underscores that as early as we find people domesticating equines and riding them, there has been a quest to gain maximum control. But what the mule owner needs to know is that it isn’t control the bit provides you—it is communication.
You cannot control these animals. You can communicate with them and make their life comfortable or uncomfortable. The belief that you can control an animal much larger than you is a farce. The bit gives communication and that communication works side by side with your training.
Bits can be incredibly effective—they can also be damaging, or even destroy your mule’s mouth. You need to have a good understanding of what bit you need to use for what work.
Using A Bit to Communicate with Your Mule or Donkey
It’s natural to think that if you’re going to work with an equine, you’re going to work with a bit. They almost go hand-in-hand.
Well, as mentioned above, you’re going to want to communicate with your mule or donkey—it goes without saying, but these animals do not understand anything you’re saying to them. When we say, “Oh, that’s good, Fluffy,” or “Come on now, girl, let’s get going,” they don’t understand a darn thing. All they know is comfortable and uncomfortable.
Over time, with good communication and strong training, your mule or donkey will begin to pick up on small words like whoa, come gee, come haw, and back up. The animal can start to associate these words with the communication they receive through the bit.
It’s not that they necessarily know what the words mean; what they start thinking is it’s going to be more comfortable for them to make a turn or stop with a verbal command rather than you picking up the reins… the reins mean they’re going to be uncomfortable.
Your primary communication for things like stop here, go there, go right, go left and back up come through the bit. Just like a vehicle going downhill, unless you are tapping the brakes, the vehicle is going to go faster and faster. The same principle applies with the mule and the donkey. Unless you are using your reins to communicate to the bit, they’re going to do their own thing, which means it is essential to use the correct bit for the correct application so you get maximum communication.
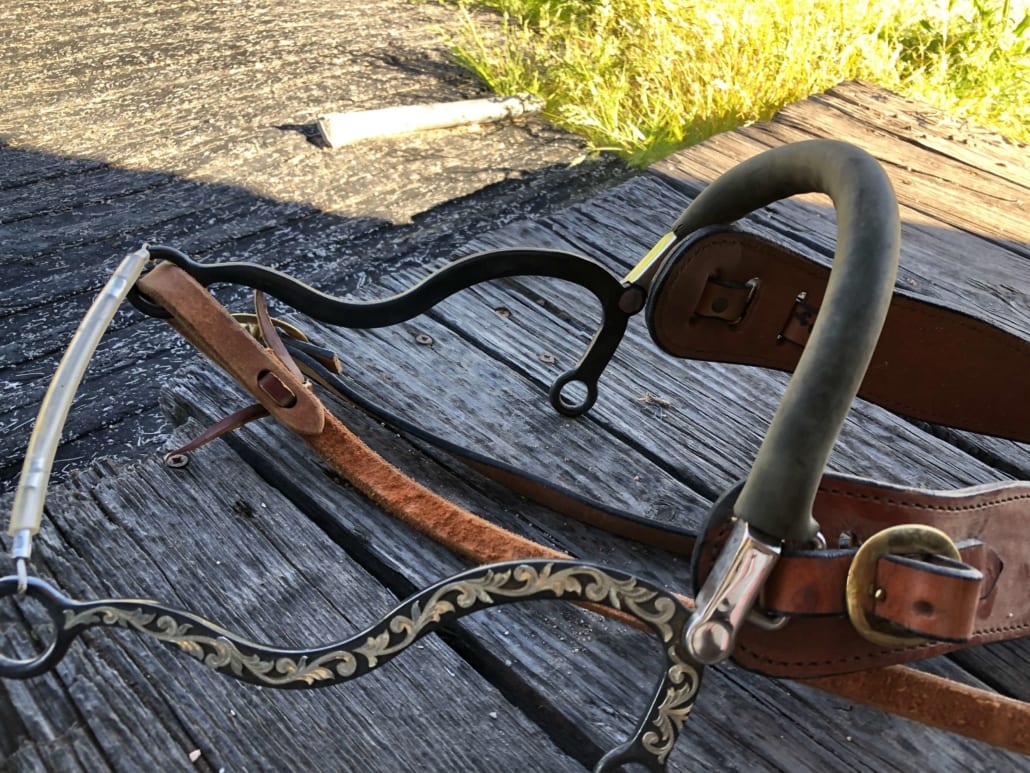
Different Types of Mule Bits
When you walk into any tack store you’re going to see a wall of at least a hundred different types of bits. Most of the time folks are going to be selecting a bit for looks. One bit may be pretty or have a nice design. Hey, sharp looking tack is great, but you want to be one of the owners who selects a bit because you understand the its communication, application, and health implications.
Hackamores
The hackamore is used on the mule’s nose. There are a variety of hackamores from the Bosal to the mechanical hackamore.
The Bosal is basically all rawhide wrapped around a rawhide core and comes in a variety of weights and thicknesses.
The mechanical hackamore is to be used only with leg communication, 80% with your legs, 20% with your hands. Since mules care more about their nose than their mouth, you want to focus the majority of your communication using the nose—not your hands—and only enlist your hands when necessary. They are very sensitive about their nose and too much activity around that sensitive area can really upset them.
Gag Bits
Another bit you’ll see is the gag bit which communicates to the nose, up into the mouth, with a chain underneath the chin.
There are a variety of gag bits, anywhere from a simple rope or even a steel bar going across the nose. The BIG problem is mules care more about their nose and less about their mouth, so when the nose starts getting sore from the combination of nose, mouth, and chain under the chin, the mule and donkey will go into a runaway mode from all the pain.
The downside of the gag bit is that you have a chain on the bottom of the bit which is supposed to communicate to the nerves of the chin. Unfortunately, many mules and donkeys actually wind up having dead nerves there because of riders getting heavy hands while using a gag bit. The gag bit can very easily slide up into the mouth pretty deep, literally causing the mule to smile – big time! That bit can also cut the tongue.
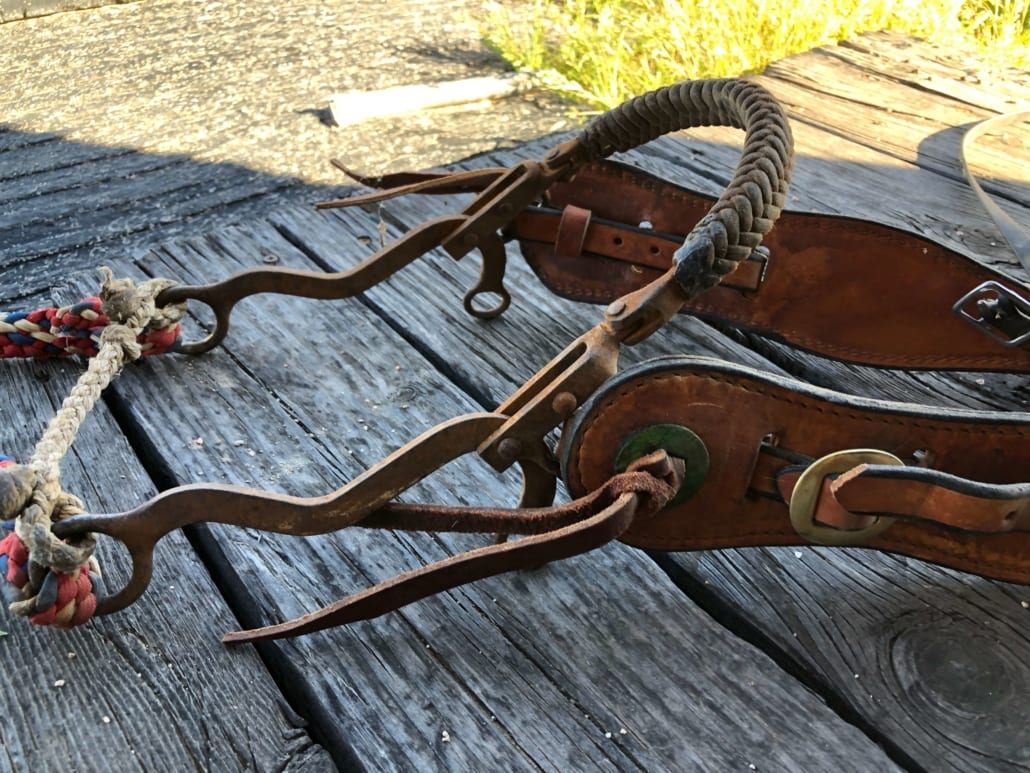
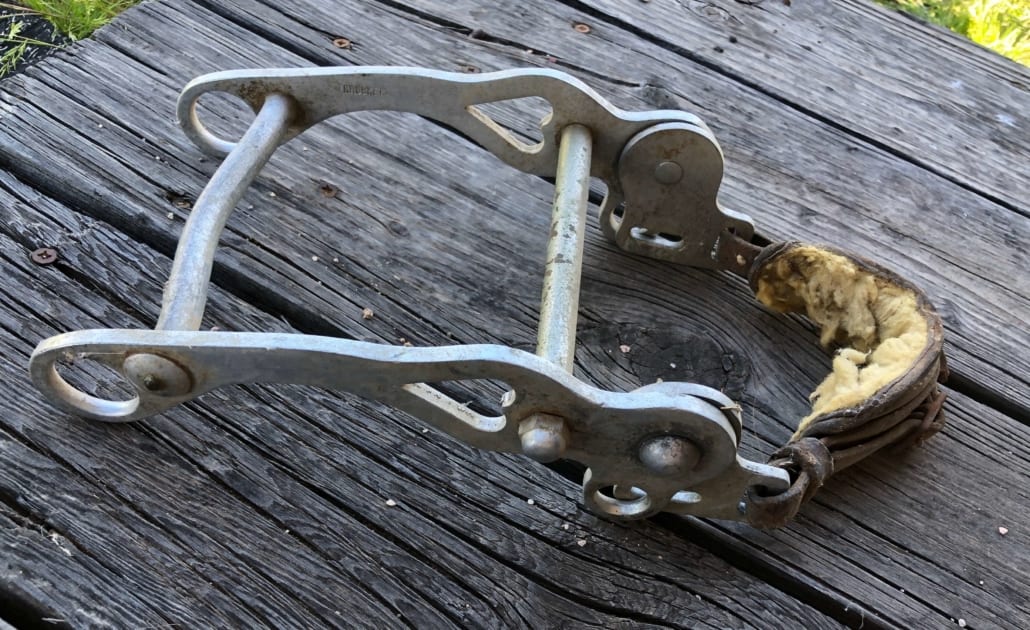
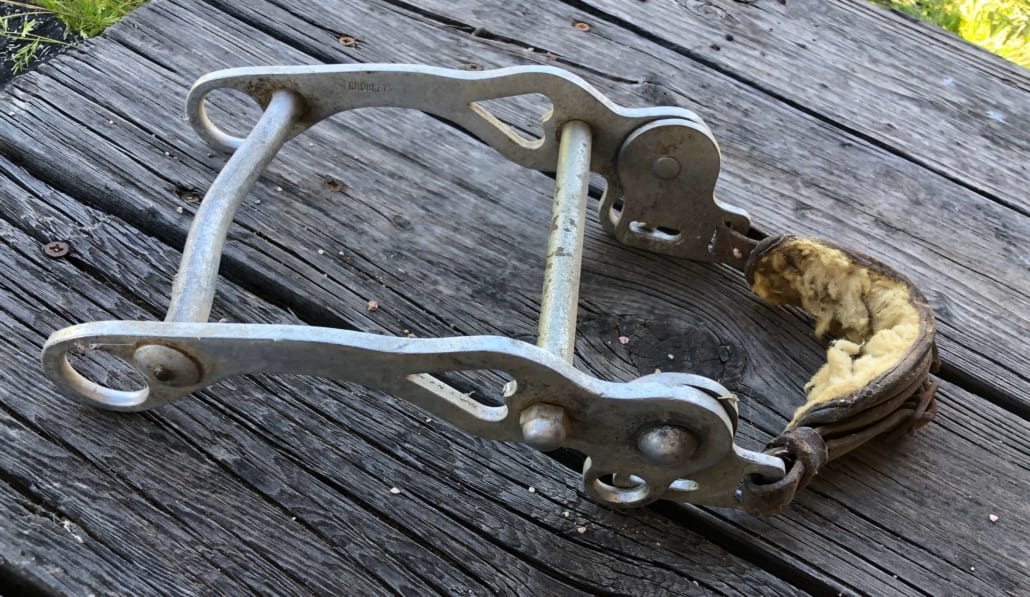
Correctional Mouthpieces
The correctional mouthpiece moves a lot and pivots at four points: on the outside, at the right, at the left, and inside at the port (right and left).
The bits I choose to use, the correctional mouthpiece, I find communicates best to the mule and the donkey. This style of bit is used by all the professional trainers, world champions of both horses and mules.
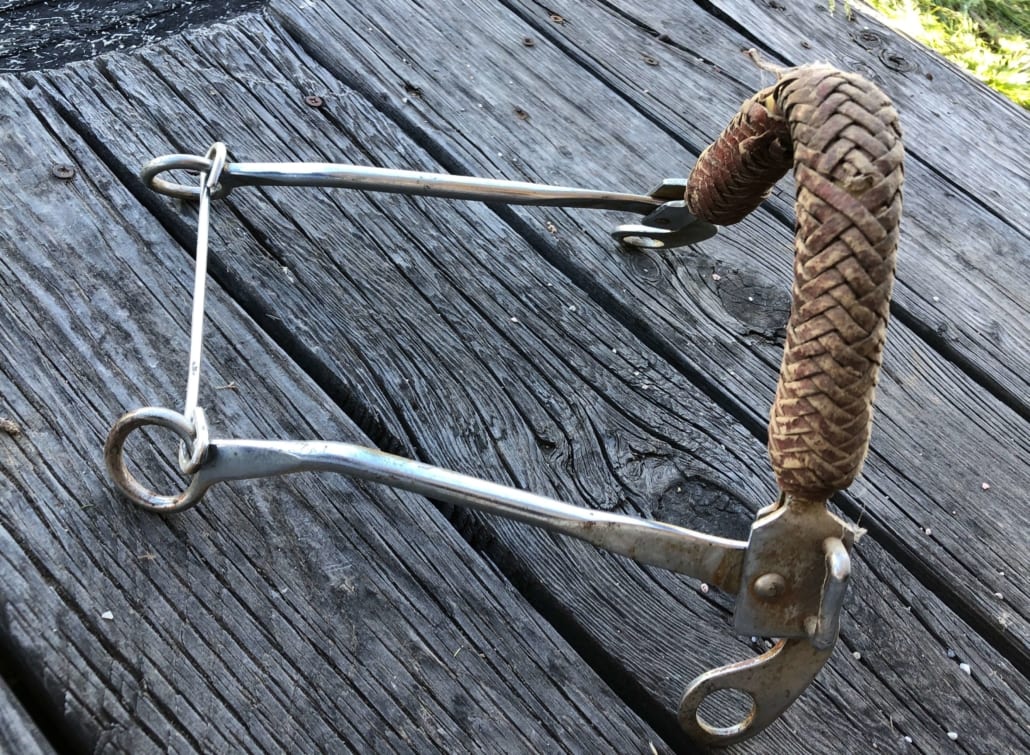
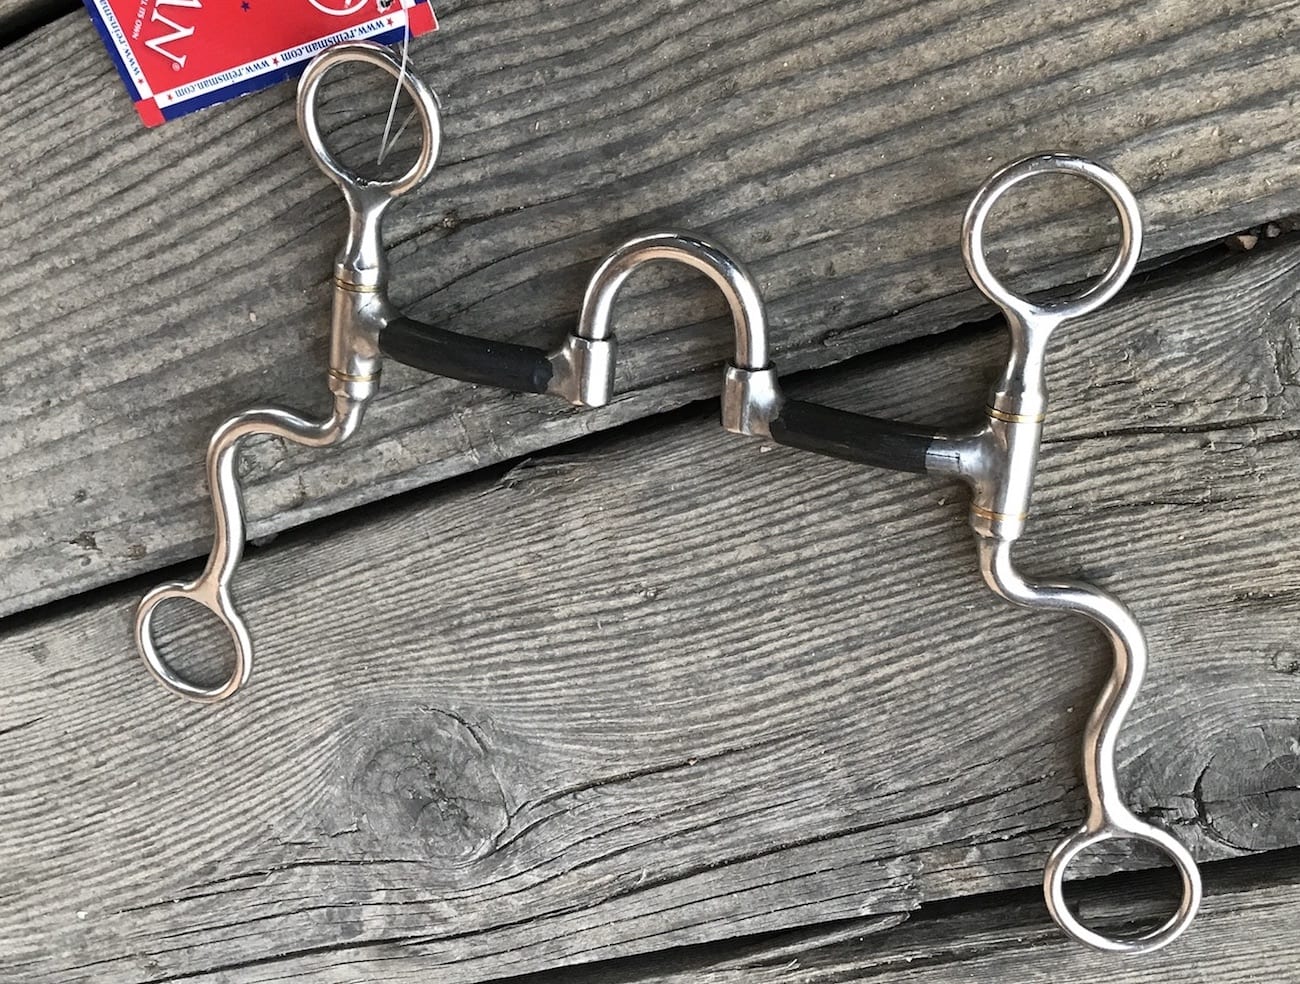
The Two Mule Bits of Choice for Riding
I’ve narrowed down my choice to two: The Mule Rider’s Martingale double twisted wire O-ring snaffle bit and my correctional mouthpiece, The Trail Rider. These two bits work the best for communicating with the mule.
Folks, I never thought I’d be in the bit business, but over the years not having a bit that respects the needs of the mule or donkey, I had to design one. I design my bit so that it tips a little forward to communicate more crisply and more cleanly with the palate. The bits I’ve designed are manufactured by Reinsman. You’ll find a lot of manufactures of bits, many from Pakistan and other countries; while it may look like a bit is a bit, the bit won’t work correctly for the mule and, over time, you’ll find it will rust easily.
Occasionally I will use a Bosal or a mechanical hackamore, but my animal would have to be very refined to use these bits. I have many other bits that are now only wall hangers – that’s all they’re really good for now that I know what I know.
It sure can be frustrating taking a pretty bit or a bit that you really liked and putting it away for good, but, friend, do it for the sake of the animal. Say, “The past is the past, I’m free at last.” The good Lord forgives us for so many things and moves on—we can forgive ourselves for using poor bitting solutions and also move on.
Different Bits for Different Activity — Use the Proper Mule Bit
Not all bits are the same. There are training bits and finished bits, there are driving bits and riding bits. You are going to use a different bit for different activities. For instance, when training for driving, you’re going to be using a double twisted wire full-cheek driving bit. With the long lines you have a lot more leverage that you must take into account with the bit you use.
When the mule is finished, you want to move from the training bit to a finished bit. I use my Liverpool Bit, a reversible straight mouth plated steel loose-cheek bit. This bit is for a finished animal and you are no longer developing much tongue communication, you are developing bar and sides-of-the-mouth communication.
If you’re starting to train a colt, you want to use the Mule Rider’s Martingale, not a finished bit. This bit-bridle combination keeps the animal’s nose on the vertical and keeps their head down so you can focus on communication.
So different bits for training, different bits for driving.
The point here is DO NOT assume that you can use the same bit for one activity as you do another. When you are riding a finished animal, you want the correct bit—The Trail Riding bit. When you are training for driving, you want the correct bit—the Driving Bit.
Using Horse Bits for Mules or Mule Bits for Horses
Here is what we need the equine world to understand:
MULES ARE DIFFERENT THAN HORSES
DONKEYS ARE DIFFERENT THAN HORSES
It has been thought for so long that an equine is an equine is an equine. Not true. The good Lord made these animals different from one another and we have a responsibility to respect the differences that they have been given.
You cannot use a horse saddle on a mule because the bone structure is different. The mule gets his bone structure from his daddy, the donkey.
Likewise, you cannot use a horse bit on a mule or donkey because the palate is completely different from a horse. Their nose is longer, their mouth has nuanced differences from a horse so using a horse bit on a mule will 1) prevent you from having the communication you need and 2) damage the mule’s ability to understand you at best, and destroy their mouth at worst.
Common Mistakes Made with Bits
There are four common mistakes people will make with bits and their mules.
Making the Bit Do the Work
The first mistake is making the bit do all the work. In other words, they end up pulling on the bit rather than making small motions with their hands. They’ll end up with their hands clean over by their pelvis when the hands should never go past the horn.
Using Horse Bits
The second mistake is using a horse bit on a mule, expecting the bit to work.
Maybe the bit will work for a while, but after a short time the mule is going to have had enough of the bit and he’s going to put his tongue over the top of the bit and take off running… and you won’t be able to stop him.
Making the Mule Take the Bit A Certain Way
The third mistake is the most common mistake made with bits. Folks will force the mule to take the bit the way they want the mule to take the bit.
You’ll find most people will create one wrinkle and two wrinkles on the corners of the mule’s mouth because their great-grandaddy said to do it that way, or because the old guy next door—who has been a horseman all his life—does it that way.
If you really want to refine a mule, let the mule pick up the bit, pack it, and show you where he likes it—and that’s where you adjust the bit.
Properly Balancing the Teeth
The fourth and final common mistake is a MAJOR one: The mule’s teeth are not properly balanced.
Before you begin riding, before you put the bit in their mouth, you should have a veterinarian or a dentist out to balance the teeth. Get the TMJ correct, get the incisors correct. When the mule’s mouth is correct, no sharp points, he will be a lot happier. That is the key thing: happiness.
Once the teeth are balanced, i.e., aligned, continue to have the teeth balanced every year after that. Maybe some vets will say “oh, you don’t need to do that,” but you better because mules and donkeys grind their feed, they do not chew it.
Because of how they grind their teeth, their front teeth (incisors) take a bit of feed and as the tongue helps it go back, the teeth on the side and the top will grind the feed. What happens is they end up getting points on their teeth or their TMJs. The teeth hang up, the mule starts gapping his mouth because he’s super uncomfortable and you have a lot of problems that will develop.
Lateral Flexions with Mules
When turning, you’ll see a lot of horsemen bend the mule’s neck back to where the nose almost touches the knee, it’s called lateral flexions. By doing this, the mule’s neck muscles are strengthening. One day you will want to go to the right and the mule will want to go to the left—he will tighten all his very strong neck muscles and away he goes.
I do not do lateral flexions.
Disengaging the Mule’s Hindquarters
Also, I do not disengage the hindquarters. Disengaging the hindquarters is where you pick up on one rein and you have the hindquarter come around and eventually the mule stops. It may work for a while, but pretty soon the mule will figure out the best way to get comfortable.
I had the opportunity to work with an attorney for an accident where a lady was told to pick up on one rein to do a one rein stop, which disengages the hindquarters. The mule will go in a circle and eventually stop.
Well, in this case, the mule didn’t do that.
The mule ran through his shoulder and the lady ended up hitting the ground, receiving a major concussion, and had to be helicoptered to receive medical attention.
This technique is a horse technique not meant for the mule.
Why Disengaging the Hindquarters Doesn’t Work for Mules and Donkeys
Think about it this way. You’re riding a mule down into the Grand Canyon, 1,000 feet down on the left and rock straight up and down on the right. If you’re packing five mules, how is it that you will be able to go around in a circle to stop them by disengaging the hindquarters?
It comes time when a lot of horse trainers have started taking to being mule trainers and they’re bringing over this technique of disengaging the hindquarters.
And boy, does it look really good when you’re out there on flat ground.
Unfortunately, my client who hit the ground in the story above wound up on the ground because of these horse techniques. It may look good, but for her it didn’t feel good having to be helicoptered off the side of a mountain.
Lateral flexions and disengaging the hindquarters will only look good and work for a short time, but when you need to stop all of a sudden, you won’t be able to stop them, it won’t work.
Bad Bits You Want to Avoid
There are some sorry bits out there and the worst one, by far, will look like a chainsaw blade on one side and rounded on the other. A lot of people call them ‘mule bits’ but they ain’t no mule bit. It is a horrible bit to use on a mule or donkey.
Another bit that folks will use is called a sliding gag bit. There are several manufacturers of these bits. They are meant to communicate with the nose, the mouth, and underneath the chin.
These bits put the mule or donkey in pain and those animals get so tired of it that they start to just flat out runaway. Folks want to know why their animal is running away and I point right to that bit.
If you have a bit that is communicating to the nose, the mouth, and the chin, you better not be using it because the time is coming where you won’t be able to stop Mr. Mule and you’ll pay for it with, at best a few sore spots and at worst, your life.
Using the Same Bits for Mules and Donkeys
As mentioned above, the mule gets so much of his structure from his daddy, the donkey. Because of this you can use a mule saddle—my saddle, a Steve Edwards saddle—on a donkey.
In the same way, I use the same bits for mules and donkeys. They share the same mouth structure and require the same communication.
I have designed my own bits because I just could not find bits that communicated to the palate of the mule and donkey. My bits are as follows:
- Mule Rider’s Martingale: This is a snaffle bit complete with bridle, head stall, and reins. This is what I use for starting colts under three years, it places the correct amount of pressure on the tongue during training, more info here.
- Trail Riding Bit: This is a finished bit used for animals that are finished and require refined communication. This is for when you’re communicating 80% with your legs and 20% with your hands and removes pressure from the tongue, more info here.
Driving Bit: This is a training bit and can be used as a correctional bit; the full-cheek gives you extra leverage to keep you from pulling the bit through the mouth, more info here. - The Liverpool Bit: This is a finished driving bit and is not to be used for training, more info here.
- Mechanical Hackamore: This is a wonderful communication tool that goes across the nose and underneath the chin. You start by placing it two fingers above the nostril and as you progress you move up to three fingers below the cheekbone and approximately three fingers below the corner of the mouth. This is not a bit, but does give you communication, more info here.
While you can use these bits on a mule or a donkey, there is another component to be aware of: mouth size. The average standard or saddle mule and the average donkey all use a five-and-a-quarter-inch bit. When you start talking about draft mules, you can increase to a five-and-a-half-inch bit. The overall value is to get the right bit for the animal, rather than try to force one on the animal that might do more harm than good.
Incorporating Bits Into Your Training
It’s easy to get excited about saddling a mule and get to riding, and it’s easy to get excited about introducing a bit as well. It is imperative that you first do your ground work with a rope halter.
Mules and donkeys care about their nose more than anything else—start all groundwork with the come-a-long rope and the rope halter. You want to see the mule or donkey start to bend easy and soften all fiver major neck muscles.
After this foundation ground training, you will go from the rope halter and come-a-long rope into the snaffle bit, which is the Mule Rider’s Martingale.
From the Mule Rider’s Martingale and snaffle bit, you will move into a finished bit, The Trail Riding Bit.
But getting back to foundation training, you want to spend about six months, training 4-6 hours a week to build a good foundation and then, before you know it, you’ll start riding and boy will it be awesome!
Ripped Tongues and Sore Mouths
It is important to note that when you start training your mule or donkey for riding, you want to use the snaffle bit, not the smooth snaffle bit. Everybody thinks if they use a smooth snaffle bit it will be easier on the animal.
Wrong answer.
I have seen more ripped and torn tongues and more sore mouths because people will tend to pull with the smooth snaffle bit. Mules and donkeys care more about their nose than they do their mouths, so many owners end up pulling hard on the bit, hurting the animals.
Introducing the Snaffle Bit
The snaffle bit is not an everyday use bit. This bit is used to fix a problem or to start training a young mule or donkey. It is very easy to stretch out the mouth if you use a snaffle bit because it communicates to the tongue, the bars of the mouth, and the corners of the mouth.
The double-twisted wire snaffle bit is meant to communicate with the entire tongue, and if you get heavy handed, the continual pushing on the tongue will be very stressful for the animal. In addition, even if you’re using a smooth snaffle bit—which you shouldn’t—that big can still cut the tongue.
When you introduce the snaffle bit you want to avoid having the bit do all the work. What I mean by that is you want to allow the bit to work in conjunction with your hands. The mule or donkey will have the bit in their mouth, trying to find a way to be comfortable. When they finally find a comfortable place, you want to allow the bit to work, rather than using drastic movements, trying to force it to work.
Start with Small Steps
Training with a bit starts with small steps. You have your reins in both hands, using direct reining communication. At this point, both hands are part of communicating to the snaffle bit. You have a lot of power in your hands.
It’s easy to want the animal to make a right turn and then move our hands in a big fashion to the right.
Nope. Wrong.
What we want is to start with just seeing the nose move toward the right. Once we get the nose, then the neck, then the shoulder, then the feet and eventually from the feet, front and rear, we will make our turn.
It’s a progression and it starts with the bit. Making the bit work is a giant move with our hands. Allowing the bit to work is just slight communication to get the nose to turn.
See the difference?
Fixing Problems with the Snaffle Bit
The snaffle bit is for training young colts and is to be used short-term. When I say short-term, I mean six months of foundational training, four to six hours a week max! That’s all you need.
These animals have a brain about the size of a walnut and they can only take in so much information. Most people will wind up overdoing the training, exhausting the animal and themselves.
I say work in steps of 3, 6, 9, 12.
Today I get the nose to tip to the right three times, the nose to tip to the left three times—now I’m done for the day.
Small steps like this eventually build a solid foundation.
Moving to A Finished Bit
After training or making corrections, introduce the finished bit. I use my finished riding bit, The Trail Riding Bit.
The finished bit has six-inch shanks on the right and left side, compared to the snaffle bit which has O-rings on each side. The purpose of the shank is not so you can have leverage, but it’s so you can ask the mule to stop, turn, and back up very easily. This finished bit is meant to mainly be used when riding one-handed. If you must communicate using direct reining, you can use two hands for a short time.
The finished bit has a port that goes up over the top of the tongue, so you are no longer communicating with the tongue. This port now communicates to the roof of the mouth, your communication is more refined, and life is a whole lot easier on your mule.
Hand Communication
It’s easy to experience problems and blame them on the bit, when in actuality, the problems are originating from our hands. We make mistakes pulling, don’t get the results we want, and blame it on the bit, or the mule.
That’s the key word there, we PULLED rather than just turning our wrists.
You want your hands in direct training position:
- Looking down at the pommel of the saddle
- Hands should be as wide as the pommel
- Both hands in a “holding an ice cream cone” position
When you make your turn, slowly your right hand twists the bit—you move your right hand from the ice cream cone position to your palm facing down and your knuckles are up.
Continuing, the right hand moves to the right, the left hand, which is still in the ice cream cone position, goes with the right hand. As the right hand moves to the right, the left hand goes with it because it’s connected to the reins, but my left hand only goes as far as the horn.
Why only as far as the horn?
If your left hand goes past the horn, now you’re pulling the mule, now you’re pulling the donkey. Their response will be to brace all five of their major neck muscles to protect themselves. You feel the resistance, but it’s not because they are fighting you, it is because they have an instinct to protect themselves. They are trying to keep you from making them uncomfortable.
Bit communication is less about the bit and how it is designed, and more about direct hand communication for the desired command.
Before You Get In the Saddle
Be patient during groundwork. That’s the most important thing. Go from groundwork into the saddle. If they’re not being good and responsive on the ground, then do not go into the saddle.
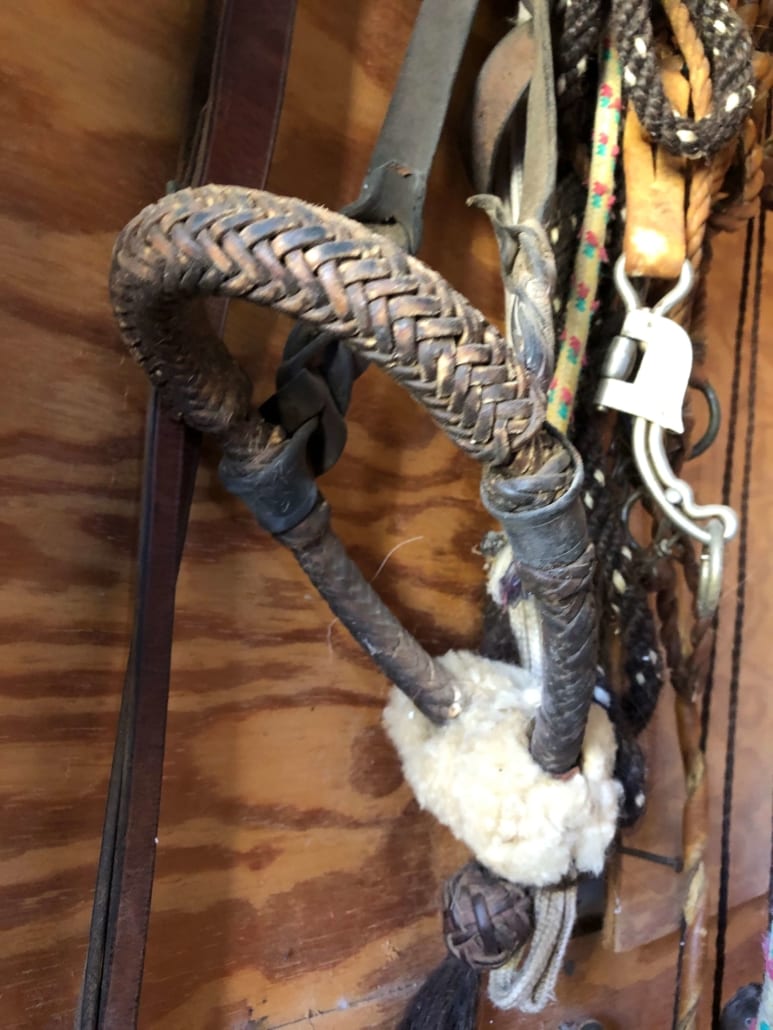
Additional Tack and Equipment to Go With the Bit
Selecting the correct bit for your application is half the challenge. The other half is completing the tack to ensure the bit works as needed. You are going to need a few more pieces for the Ole Fluffy puzzle.
- Saddle designed for a mule (not a mule saddle: a Steve Edwards saddle).
- Britchen—not a crupper.
- Reins
- Bridle
If you’re going to be starting with the Mule Rider’s Martingale, it will come with the reins, the bridle, and an instructional video.
If you are ready for a finished bit, The Trail Riding Bit comes by itself. You will have a decision to make on whether to go with an all leather bridle or whether to go with a beta bridle. You’ll also have the same choice for your reins—all leather or beta?
Leather has the traditional look that a lot of folks want. You’ll want to maintain the leather, keep it oiled, and invest a lot of work in cleaning. Beta, on the other hand, is much stronger than leather, is easy to clean, and looks great!
Ultimately, the material you choose is going to be your preference for what you want to look at. Both are good-looking materials. Regardless of which you choose, if you go with QVMR bridle and reins, both materials will have QVMR Conchos that provides a really nice look.
Which Bit to Ride With Today
I pretty much always ride with the same bit. You won’t find me changing the bit from ride to ride.
However, I do not put the bit on in the same way everyday.
I loosen up the bridal when I take it off. When the bridle is loose it is a lot easier to remove and the mule won’t be so ear shy.
After loosening up the bridle like this, when I put it on, it’s two holes below where I usually adjust it. After I put it on, I let the mule stand there and chew on the bit, pick it up, put it down, and move it around. When he is comfortable, I’ll adjust it where he keeps it. Sometimes it’s the second hole up, sometimes it’s the first hole up on the bridle.
Which Bit to Drive With Today
I drive with the Liverpool bit when the mule is finished. I train with the double twisted wire full cheek driving bit when I’m training.
Riding With Two Hands Versus One Hand
The most common question folks will ask about bits is, “Which bit should I use?”
The short answer is if you’re training, use the double twisted wire snaffle bit. If you’re mule is finished, you want to use the Trail Riding Bit.
However, the long answer is important to know so you don’t destroy the mouth of your mule.
If you are riding with both hands on the reins, you are using direct communication. If you’re using direct communication and you’re using a finished bit, i.e. my Trail Riding Bit, two hands will be putting too much pressure on the bit—this finished bit is meant to be used one-handed.
For those who are using two hands, why are you using two hands? Is it because the mule won’t turn? Is it because the mule won’t stop?
If you’re having communication issues and the mule isn’t responding, then you need to be using the Mule Rider’s Martingale. The double snaffle bit will give you cleaner communication.
The Unfortunate Side of Riding with Two Hands
Unfortunately, most people ride with two hands all the time, just like their hands are on a car’s steering wheel or bicycle handlebars. Two hands on the steering wheel and on the handlebars is the safe way to drive a car or ride a bike, but it is too much pressure for the mule.
It’s all over the internet, people riding with two hands. If you look at any photo of a rider with two hands on the reins, photos from Facebook or Instagram, you’ll see the mule’s head is up and his nose is sticking out.
The mule lifts his head up to try and get away from the pressure you’re putting on the reins.
The mule’s nose is out to keep you from pulling on him.
Folks just don’t know what they’re doing to their animal. An owner will have a real nice animal and they’ll even say, “He was a really nice animal when I first bought him. He was doing everything I wanted. Now, he’s not doing that any more.”
Folks, you’re going to make mistakes and it’s okay. Keep learning, make adjustments, and leave the past in the past. If you watched some of my training from 10 years ago, then watch my training today, you’ll see I do some things differently.
Why?
Because I learned from the mule. I listened to him. I saw that there was a better way to do things and I did what was best for him.
A lot of problems have developed in recent years because more and more folks are coming to mules and donkeys from the horse world and they’re bringing their horse knowledge with them. You cannot train mules and donkeys like horses. I cannot use horse tack on mules. You cannot ride the mule or donkey like you ride a horse.
You want to eventually get to a point where you are riding, communicating 80% with your legs and 20% with your hands. That should be your goal.
If you need to go to a double snaffle bit to make some corrections, do so. Make your corrections, get your communication clean, and get back to the finished bit.
When Not to Use A Bit
You should always use a bit any time you are riding. Anytime you are on the ground, you want to use a properly adjusted rope halter. If you’re teaching something new, use a come-a-long rope.
Your come-a-long rope will always give you the ability to communicate when the mule’s stress comes on.
Same thing with the Mule Rider’s Martingale.
When there is a lot of stress, for instance, when the mule is going to a new venue where they will be shown and they want to see all the new animals around them. This is the time they will stick their nose out and throw their head up in the air.
The communication that comes with the come-a-long rope or the Mule Rider’s Martingale allows you to foundation train them and get them back to their right mind again.
Still Have Questions About Your Bit?
There is a lot of misinformation out there about bits, and you want to do what’s best for your animal. You want to avoid mistakes as much as possible. If you have any questions, you can always give me a call. I want to help the mule, the donkey, and most of all I want to help you. I want you to experience the best your animal has to offer.
Bits are a very popular topic on my live stream events as well. You can catch all my past live streams at the link below.
Happy Trails!
7 thoughts on “Mule Bits – Everything You Need to Know”
Looking for information on bits. I bought a matching pair of mules, 11-12 years old. Bought complete new harnesses and tack. when harnessed on the ground the walked and obeyed great but when I hooked them to the wagon they wouldn’t listen. Wanted to kinda run and not walk. Thought I was going to stretch out the reins trying to whoa them. They would but not very well. Now I don’t know the background of these animals, I almost wondered if they weren’t pulling mules. They ride under the saddle pretty good though. Co I need a special bit to get them to mind? Maybe they just need tuned up some. I guess if I have to I can take them to the Amish and have them work them but was hoping not. The goal is to have them pull wagons in parades and hayrides and such. Advice from a professional would be great.
Hi my name is Jerry. I’d like to ride my Caribbean donkey. Spanky likes lots of attention. And he’s a very busy donkey. Maybe a ride down to the beach could help him feel more settled. Any way do you sell bits or can you recommend a place to purchase one to fit Spanky.
Thank you
I’m very thankful I found y’all. It’s wonderful to find someone who is able AND willing to share such clear and precise information. A local farmer was clearing his fields of all his wild donkeys. I had no intention of taking one on. I already had 2 horses and a pony. I took a young jenny that I gave an age of 6 months when she came. That’s been over a year now. I absolutely love her. She receives vaccinations and farrier care right along with the horses. They have welcomed her very nicely into the herd. She’s loving and trusting and it’s time to move forward. I’ve taken everything you have taught here to heart. Thank you so much for sharing your amazing knowledge.
Steve,
After reading this article it appears I may need the mule riders martingale before using the trail riders bit that I already have. I also need to learn to ride with one hand, not 2 and use my legs much more than I have in the past. My problem is I am trying to learn from a horse person, not a mule person( not their fault) that’s what they know! This will be a long process but I have a good mule!
Thanks
Jim Lee
Do you sell any of those little colored Jenny’s? She would have to be real special, and trained for a little old lady. My husband says I can’t get hurt again, so I immediately thought mule, because I grew up riding and driving all sizes and shapes of mules. The only thing better than a good horse is a great mule! Plus donkey would prefer a longhaired friend he said lol
Hi There!
Really hoping to get some counseling from you and order a bit.
Thanks!
Grant
I bought a 15 year old jenny mule and her training bit came with her. It is a single twisted wire bit with noseband and curb chain with 8″ shanks cheeks. This was all she ever was rode in. I would like to use a different bit for her. Should I change or just keep using this bit combo? She takes the bit well though. She also does not neck rein well. She has just always been used for trail riding. I would like to transition to a less aggressive bit. Please advise here. Thank you. Love your videos.
Carmen