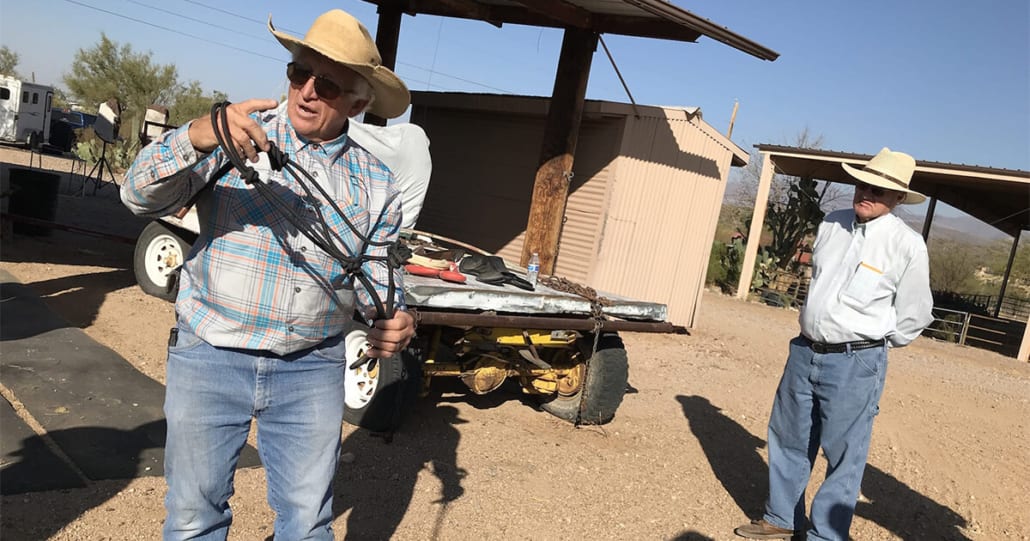
What is a Rope Halter Used For?
Proper ground foundation training for your mule or donkey is imperative. The first step is the come-a-long rope, and a fully adjustable rope halter is the second step in training your mule or donkey. It’s a refined way to teach the mule how to go left, go right, backup, and stop. What I mean by refined is communication with your mule that is precise or exact.
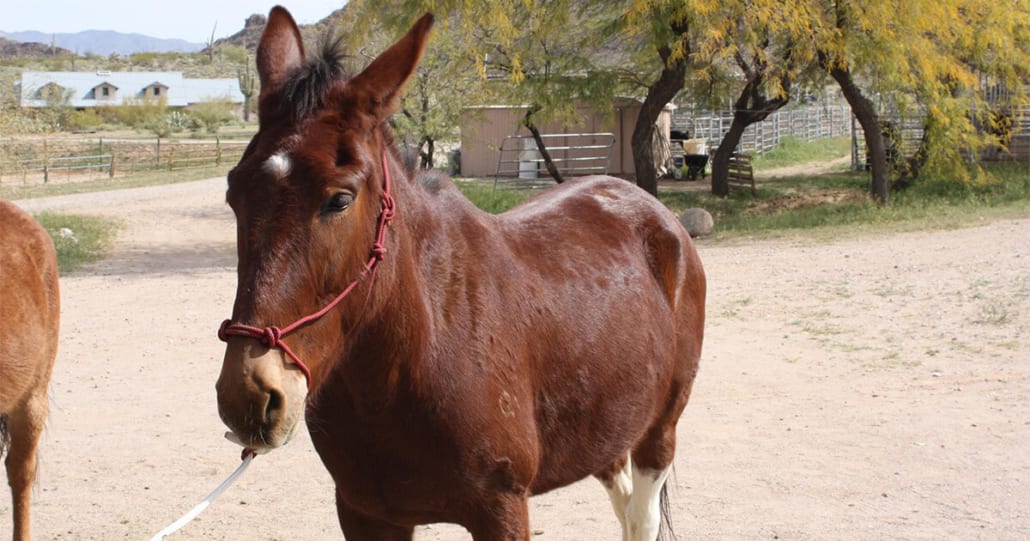
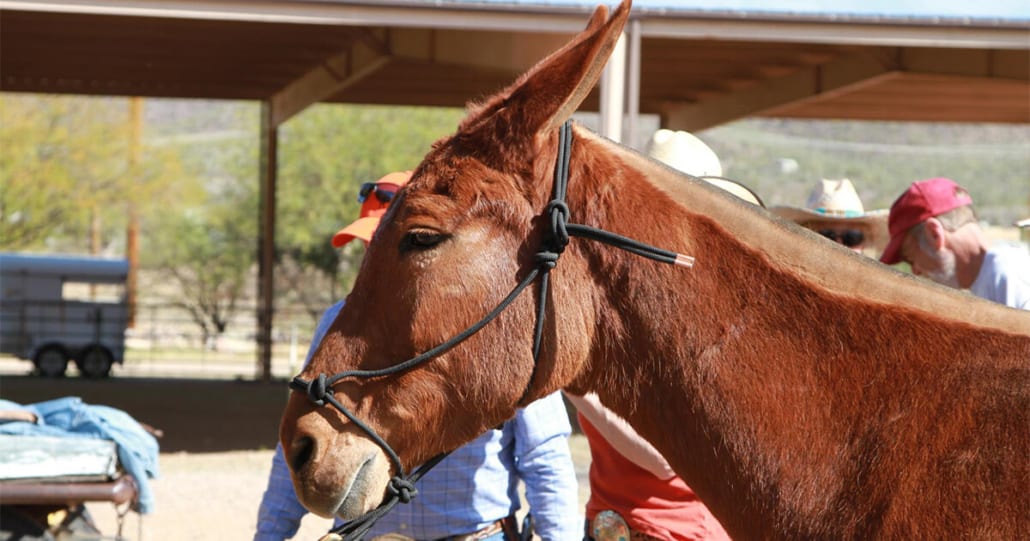
A properly adjusted rope halter has big knots in it, one on each side of the nose, two fingers up from the nostril. When you ask your mule to go left or right, stop, or backup, you put pressure on the knots on the halter with the lead rope.
Get your mule to back up using a halter
To train your mule to back up, you’re going to start by putting constant pressure on the halter with the lead rope pointing to your chest. The mule is starting to get uncomfortable and is trying to figure out what it can do to get this pressure off his nose.
Well, at first, he will try to stick his nose up in the air, then he will try to take his nose to the right and to the left, but the constant pressure from your hand to the lead rope pointing at your chest says to the mule, “you need to think about this.”
Pretty soon the mule thinks, “if I put my nose up, I can’t take the pressure off, if I take my nose to the right or to the left, I can’t take the pressure off, what happens if I drop my head?”
When he drops his head, he takes the pressure off his nose, and that’s the mule’s first step to understanding when both knots are on the nose and a small amount of pressure is there that the mule, the donkey needs to back up.
So, when he drops his head the pressure comes off the nose, you relax your lead rope for the count of 5, then you put pressure back on the lead rope again. The mule is thinking, “ok if I try to go up or down, right or left I don’t get anywhere, but if I drop my head, you let go of the lead rope and I will be comfortable.”
So, he tries that. He drops his head, nothing happens. You still have constant pressure on the lead rope. Then the mule all of a sudden moves a foot backwards. When he does that, immediately release the lead rope. Now, the mule knows that going right, going left, sticking the nose up creates more discomfort.
Dropping the head helps, but moving his feet takes the pressure off. Now you go ahead and add the pressure again with your lead rope. The mule thinks, “ok, I know how to get this. I’ll move my foot.” The pressure of the lead rope is still on.
He’s thinking, “wait a minute. I moved my foot and you didn’t let go, so what happens if I move another foot?” Another foot moves, and you release the pressure on the lead rope.
Pretty soon the mule starts seeing that as soon as he feels a slight amount of pressure on his nose with the right and left knot, the mule needs to go backwards. As he goes backwards, pretty soon the knots release, he gets back to his comfort zone. You’re taking the mule’s thoughts of comfortable, uncomfortable, and you are teaching him that if he responds correctly to the halter, you will release him.
What to look for in a rope halter
What you want to look for is an adjustable rope halter. Most of the store-bought halters have been really tightened to work where the manufacturer feels they work on the majority of equine. Unfortunately, those knots are not in the correct place to have crisp, clean communication with your mule or donkey.
Can you buy those halters and adjust them? Yes, you can, but it’s a lot of work to soften the knots. You must put them in a 5-gallon bucket of fabric softener overnight, then take pliers and a Phillips screwdriver to work the knots loose. It’s taken me two-three hours to loosen up knots and re-adjust them.
That’s why I designed my halters so that they are easy to adjust.
What about a nylon halter?
Nylon halters are not ok. They’re a big wide band. The mule can brace against it, the donkey can push through it. Everybody thinks about the short-term basis and doesn’t see what the mule or the donkey is doing.
Mules and donkeys will stick their nose out and put pressure against the nylon halter, tighten all five major neck muscles, and try to take control of the situation that way. Or they’ll elevate the head, trying to take control of the situation that way.
Their life is comfortable, uncomfortable. Their life is flight because of fright. They are trying to find some way to get comfortable, and with the wide nylon halter they’ll eventually see that they can get away with pulling you and taking you mule skiing. Unfortunately, when they jerk you around, you add a chain to the halter and that chain then hits the nerves under the chin. We kill the nerves when we add a chain to the halter.
If you’re going to show your mule or donkey, the judges don’t like rope halters in the show ring. My suggestion is to use a nylon or leather halter, for a short time it’s ok. As quickly as possible after showing them, get them back into the rope halter to keep them foundationally trained.
Why do you insist on rope halters?
The reason I insist on my rope halter is because it allows me to have cleaner, crisper communication with my mule or donkey – better than any other kind of halter. The problem with the other halters, they’re not adjusted correctly, and you end up teaching the animal to brace and fight you. Whereas mine can be very easily adjusted.
The knots on the nose and the rope on the bottom of the chin touch nerves – those nerves are very sensitive. The rope touching the nerves will get the animal to react quicker. This crisp, clean communication with a properly adjusted rope halter helps the animal to be more comfortable and more relaxed quicker than with your commercially accepted halter.
Start Training a Young Mule With a Halter
I like to start training with a halter on a young mule when they come out of the sack. That’s basically when they stand up for the first time, they’re getting their first colostrum.
Right after that I take a hay string and put a come-a-long hitch on them and I move their nose a teeny bit to the right and to the left, down and back and around for just a few seconds. I take it off and I let the colt go back to spending time with his mother.
I’ll come back, oh, maybe an hour or two later, I’ll catch the colt, I’ll rub him all around, I’ll put the come-a-long string on him again. This time I’ll add a little bit more communication with him.
By the time they’re six months old and ready for weaning, they have an idea of what to do. It’s crucial, the sooner you get your hands on them and do simple halter training, the better your animal is going to be.
The mama lets you touch her baby?
The mama is a horse, mules cannot have a baby, they are missing a chromosome. If she’s a good mother, she’ll allow you to touch the colt anywhere. It’s called imprinting. That’s extremely important for baby mules.
I’ve taken some of these babies and gone in with my jeans and long sleeve shirt and take them out of the sack the minute they’re born, help them up, and get them moving around. I try and put as much of that smell on me all over my clothes, hands and gloves. I take the mother and rub on her nose. That’s a whole other subject. Yes, they usually will accept it extremely well.
How to put a halter on your young mule
Young Fluffy should be easy to catch. Oh boy, he should be willing to come to you without a treat, to be petted and rubbed on. If they are concerned about the halter, then you’re going to have to go through some steps to prepare them for the halter. There’s a whole other mega subject to get into for training for halter and come-a-long work.
To help ease him into trusting the halter, you want to bunch it up like it’s a brush, so fold it up. If you can pet him all over, then take and use the halter to rub around him, around his legs, around his head so he thinks the halter is just part of getting rubbed down and petted on. Start rubbing on his shoulders, just like you would with a brush. Do that on the right side for three minutes and then on the left side for three minutes. You’re done for the day.
Two days later, go back, and do the exact same thing – six minutes of brushing on the right side, then six minutes of brushing on the left side. If he shows you any resistance, you have to stop, and that’s okay. Stop. Wait a couple days, then go back and start again with three minutes on one side and three minutes on the other.
Once you can do a day of three minutes on each side with no problems, do six minutes on each side a couple days later. A couple days after that, move to nine, wait a couple days, then move to 12 minutes. If he gets antsy and you can’t finish, start over again.
Now, over the course of the week or so that you’re doing this, let out a little bit of the rope. Not a lot, just a little bit at a time. Probably not any on the first day… Take your time, let him get used to ‘the brush,’ then as you sense he is comfortable, start letting it out.
By the end of the 12 minutes on both the right and left, you are at a good place to go ahead and start trying to put the halter on with something he’s become familiar with. Brush him with it until he starts relaxing and saying, “Ok, I’m happy with this.” When he starts to relax, then go ahead and put it on.
See, mules are very sensitive about their nose. Some mules or donkeys you can move fast with, some you better go slower. Every step, every move is a picture so that the mule sees that it’s not going to eat him, and he won’t be quite so sensitive on his nose.
Whether you brush him for a few days with his halter or for a month, it depends on the mule. Always remember when the mule’s head elevates, it means he has a concern. When the mule’s head is down, that means he’s not concerned with the problem. When the mule’s ears are nice and quiet and relaxed, that mule is saying, “everything you’re doing is okay.” But when the mule’s ears are stiff, he’s concerned, it means you’re going too fast, slow down.
You have to see the countenance of the mule to see how you’re doing. How you’re doing is told by the mule’s ears, the mule’s head, the relaxation.
Once the halter is on, should I start training?
The halter is your second phase of training. The first phase of training is the come-a-long rope, it builds your foundation. I don’t usually introduce the halter into my training process until the third month. We do want to use the rope halter at the same time as the come-a-long rope to be able to tie the animal to a hitching rail.
Training an Older Mule With a Rope Halter
The very first thing I do with any mule of any age, is I put my come-a-long rope on him, and I start my ground foundation. My ground foundation tells me everything I need to know. It gives me an idea of how much the mule respects me on the ground, how much the mule respects the lead rope, how much the mule respects the halter.
How long do I use the rope halter?
I don’t use any other halter but the rope halter for almost everything. There is another type of rope halter I use when the mule is more refined in his communication. It has a braided noseband and I would use that.
When I go someplace new, like a stable or on a trail ride or something like that, I always use my come-a-long rope to start with as a quick tune-up, then I go from there to my rope halter, then from there I go into my braided noseband.
Here’s the problem. Everybody thinks once Mr. Mule is trained, he’s going to stay trained in every situation. When you ride on a new trail or when you go to a new stable, you got a good opportunity for a wreck. So, I always use my come-a-long rope to help me communicate crisper and cleaner and to remind the mule about his foundation training.
You will want to take a few minutes in a new place to remind your mule of his foundation training. If your foundation training is correct, then in just a matter of minutes the mule gets a hold of it.
The problem is, when it comes down to these mules, flight because of fright is there. There’s no amount of training that’s going to take that away. You need to control the situation and that is done with the come-a-long rope, it’s done with the rope halter, then the bit. The bit is going to depend on the situation. I always, when I’m in a new place, use the Muleriders Martingale and I go from there.
I’m always going back to what I call a tune-up. When I would go to the World Championships, in preparation, I would get there a couple days ahead of time. I would let the mule see all the new sights and sounds, all the new smells, then I would do ground communication. When the mule started relaxing, the mule started being consistent, then I would go to my other steps.
Again, just because they’re trained, doesn’t mean that a new situation doesn’t create some new possibilities of problems. They are at the bottom of the food chain, so everything to them is a predator. They are aware of that all the time. So, you should be, also.
It sounds like a lot of work, but let me just point this out. Before I get ready to go on a long trip, I get my vehicle and my trailer prepped. I check the air in the tires, I check the oil, I make sure my brakes are right, I clean my air filter. I make sure everything is mechanically ready before I go out on the road.
This mule is no different. When I take it to a new place, I need to have the communication capabilities to be able to make sure the mule understands that he needs to stay under control. And away you go from there.
With mules, it’s a simple tune-up: Do you remember? Do you remember? Do you remember? Why do you want to climb on a mule when he’s upset? Why not take care of it on the ground first? Make sure everything’s alright, do your tune-up. Everything’s cool? Alright, now climb on. As your mule progresses, the more he gets to understanding things, the quicker the tune-up gets done.
What else do I need in addition to the rope halter?
You’ll need a lead rope; you might need a couple of them. A lead rope is going to depend on what type of work you’re doing. Your lead rope can conceivably be only six-foot-long for just the average leading around. Or it could be 20-foot-long if you’re ponying the animal.
A come-a-long rope is the other thing you need. The come-a-long rope will get you cleaner, crisper communication with your mule.
Training exercises with a come-a-long rope
I can do foundation training with a lead rope and I can do it with my rope halter. But if I’m not getting crisp, clean communication right off the bat with the rope halter, I’m going to stop with the rope halter and I’m going to go directly to my come-a-long rope.
With a lead rope you can train your mule to stop, go right, go left, and back up. I do not lunge my animals. That’s kind of a senseless measure to them. They don’t understand being on the end of a lead rope, going around in circles. That’s called lunging. I don’t mess with lunging.
You can use a lead rope for tune-ups, but sometimes it doesn’t work as crisp and clean. Again, if they’re responding well with the rope halter, that’s good, you don’t have to go to the come-a-long rope, just have it ready.
Should the same person always train the mule?
As long as everybody is doing the same thing, which really doesn’t happen, sure! It’s really best when you’re building a foundation for the same person to do it for the first six months because different people are going to have different ways of communicating the same thing. One’s going to move their hands a little bit different, another’s going to be quicker, someone else isn’t going to be so quick.
My suggestion for the first six months is to have one person do all the foundation training. After Mr. Mule has foundation training down, another person can now be a part of the training, after learning the training technique of the first trainer, and then progress from there.
I’m Here to Help
If you are training a mule, I hope this advice will help you. Just remember, it all starts by building a foundation with your mule.
As always, you can give me a call or send me an email, including photos and videos, about any questions you have about mules and donkeys.
Happy Trails!
1 thought on “Problems Installing A Halter”
We have just gotten 2 donkeys. One is a year old and the other is seven months. Neither will let us touch them let alone put a rope halter or training rope near them. Thoughts on how to get near them to start the process without causing them to distrust us too much?